
I moved into my tiny, perfect house in Oakland in August of 2015, and my partner and I have been slowly turning it into a real home. From replacing broken thermostats to installing an embedded cabinet over the bathroom sink, I personally think we’re doing a marvelous job at making our house nice without spending much money.
One of the biggest problems is that our kitchen is tiny. And there isn’t much room for storage. We’ve been slowly adding shelves where we can, and wall-mounting things to save cabinet space.
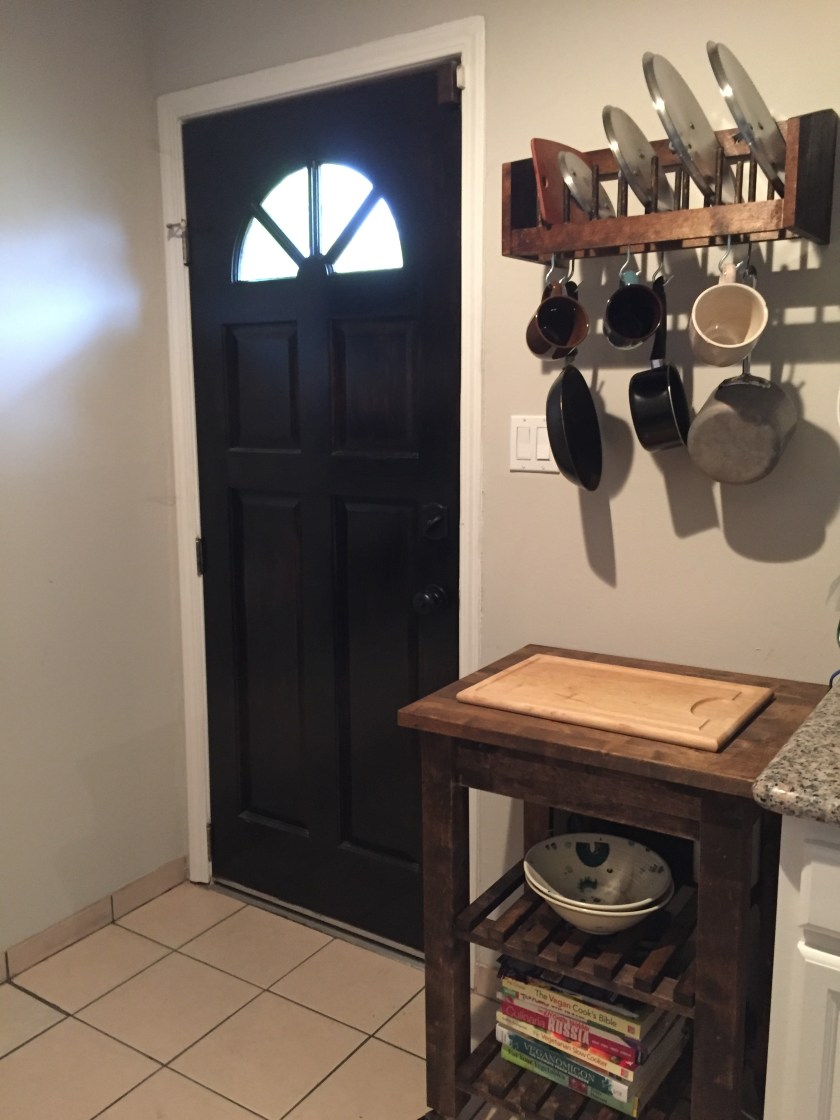
Today I’m showing off what I consider to be a tiny masterpiece: a kitchen cart and wall-mounted lid organizer. Both fit into the small area between my backdoor and my countertop—space which we’d been wasting before.
The kitchen cart was originally $60 from Ikea, but I found it cheaper on Craigslist. It’s actually easy to find cheap Ikea furniture on Craigslist—just figure out what you like at Ikea, then set up an alert whenever something with that name gets posted. With a name like “Bekvam,” it was easy to find this cart.
Then we grabbed some dark cherry wood stain, finishing oil, a tarp, some gloves, and a few cheap rags from the hardware store.
To stain furniture, you apply a very small amount of stain and then wipe it away. I used a small sponge. It can’t pool or drip, or it will look terrible. (I know, I ruined a dining room table once.)
Luckily, the unfinished microwave cart from Ikea didn’t need to be sanded much, so staining it was simple. (Here’s a basic intro to wood staining, if you haven’t done it before).


I originally intended to go darker, but I fell in love with the dark golden pattern in the wood, so I stopped a few shades lighter than I originally intended.
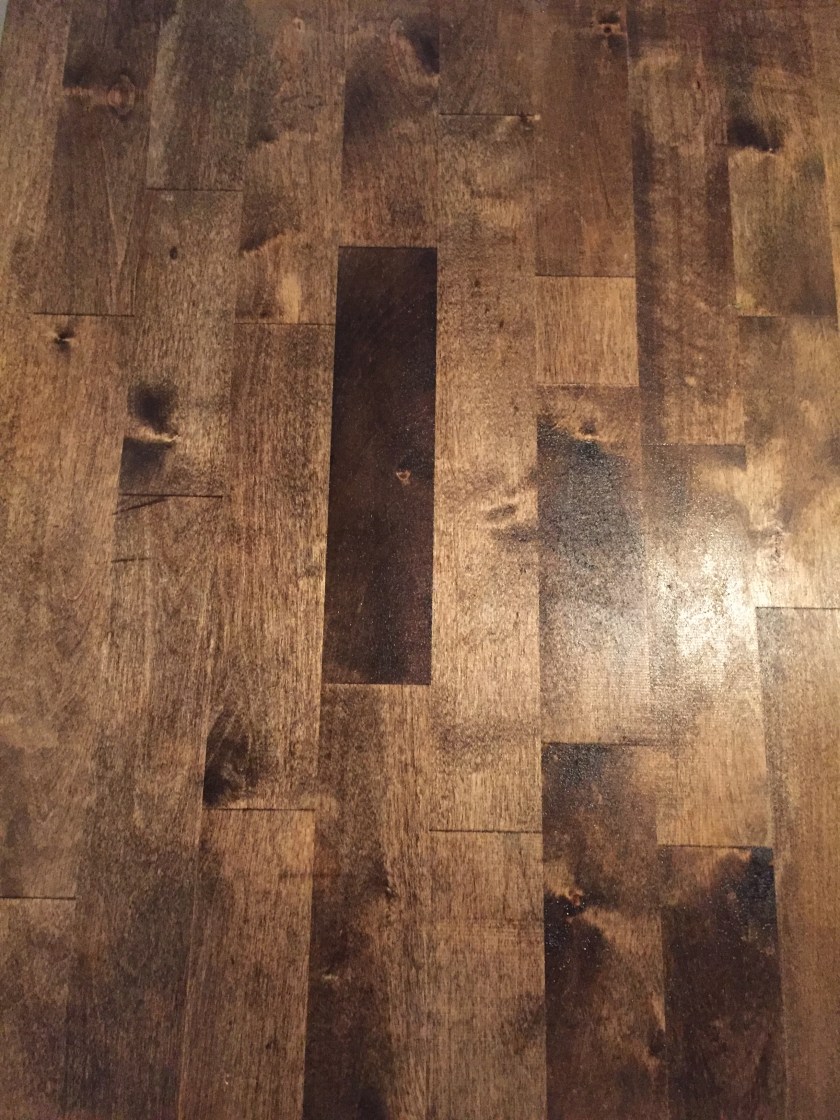
I only spent a few hours on staining, and then let it dry overnight. Then a little touch-up in the morning, some more drying, and then we ran a protective oil over the entire thing. Two days later, we had a beautiful new kitchen cart.
The lid holder, unfortunately, was not as simple.
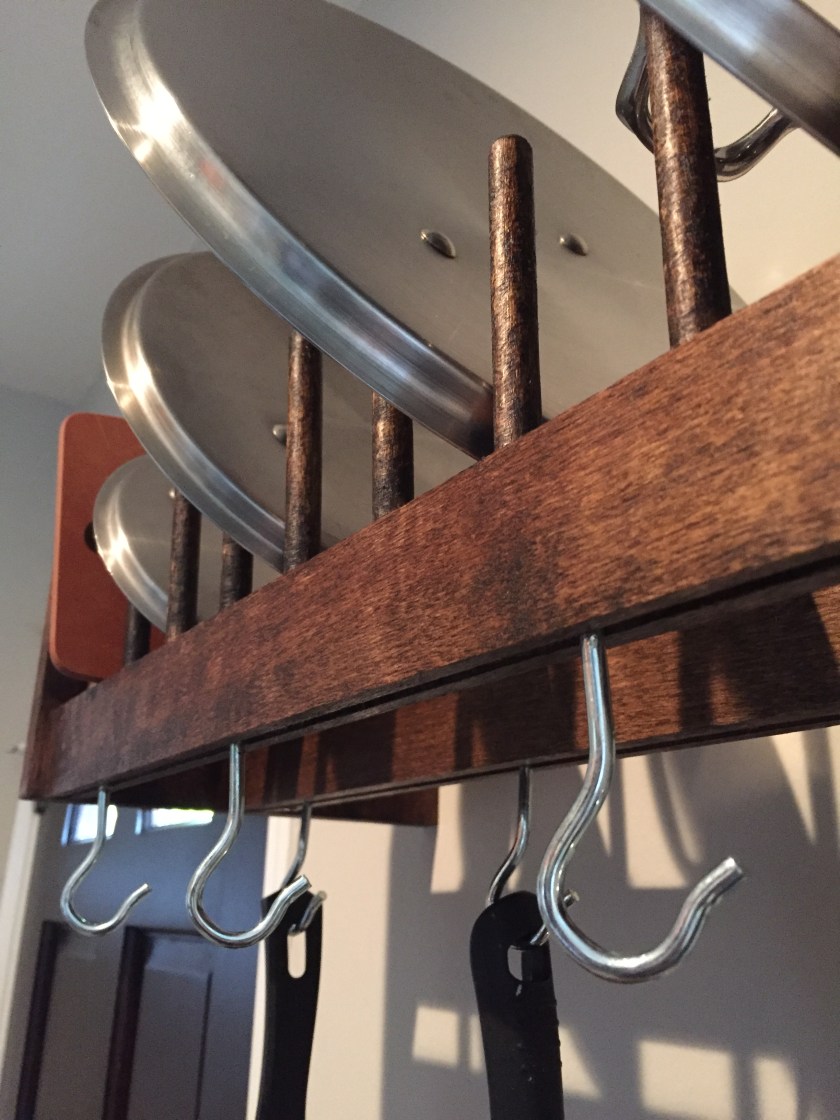
We bought this lid organizer off Amazon. Unlike the Ikea cart, it was already finished.
Which meant hours and hours of sanding.
Thankfully my partner has a multifunction power drill (I think that’s what it’s called?) which has an adapter for sanding, and we were able to use that to sand the majority of the lid organizer. But it was very difficult to reach down to the creases between the dowels. Deciding the perfect was the enemy of the good, we just sanded it as best we could, stained it, and called it a day.

We tried to mimic the shade of the kitchen cart, and I think we got pretty close.
The end result? No more clattering pot lids cascading out of the cabinet whenever I need to grab a frying pan.
And there are even a few hanging hooks below for small pots and pans or mugs.
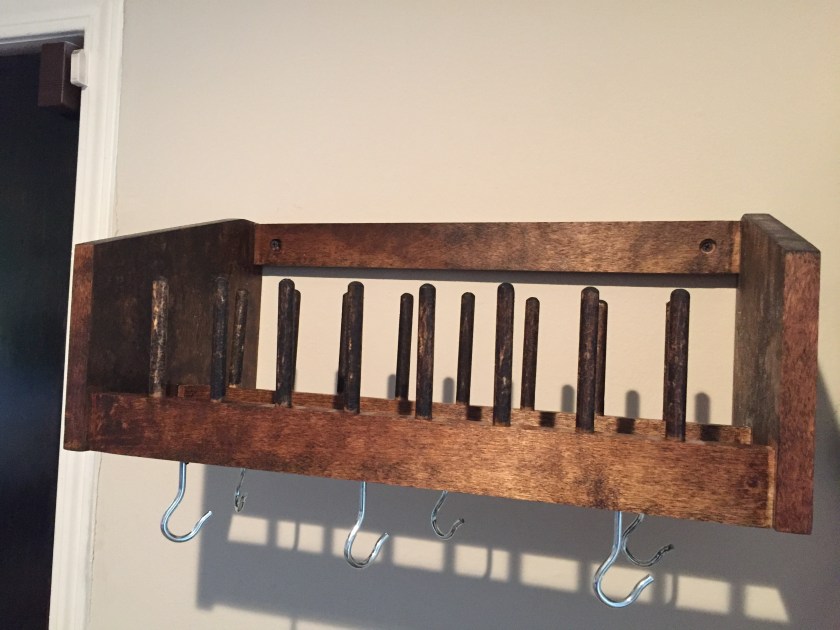
The dowels didn’t come out perfectly, and one of the back screws didn’t want to go far in the wall. Nonetheless, I’m still ridiculously happy with it.
There’s something particularly nice about having done this ourselves. I don’t have a lot of downtime at home, and so carving out the hours to see this through from start to finish was in itself a challenge. From bargain hunting on Craigslist to careful wood staining to wall-mounting, this project was a lot more about time and energy than about money. And while I know there are imperfections in the final piece, I somehow don’t mind. Maybe I even like it more because of those little imperfections, each a little testament to our journey down the slow, stumbling path toward self-sufficiency.
